
Creating Flat Stones for Jewelry

Creating flat stones for use in jewelry can be a fun and fulfilling way to exercise your lapidary talents and creativity. While most folks may be somewhat familiar with cabochons which are similar but typically have a domed front side, flat stones which are sometimes called buff-tops, can be quite versatile without requiring the same set of skills and machinery it takes to create artisan cabochons. At the conclusion of this tutorial you will have the knowledge required to create a batch of beautifully designed and polished flat stones, ready to have bales attached by various methods including drilling or gluing, wire wrapping or metalsmithing.
What you will need to get started:
- Flat slabs of lapidary grade rock approx 1/8 to 1/4 inch thick
- Shape templates and aluminum scribe or other marker
- Lapidary trim saw
- 180/200 grit diamond metal grinding wheel
- Flat lapidary machine with SiC 120/200 and 400 grit (optional)
- Vibe tumbler and various grits
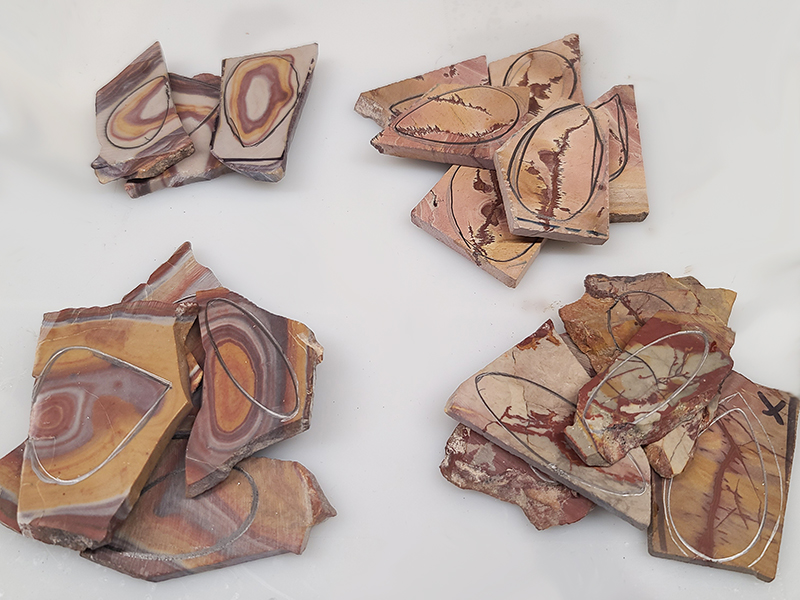
For the creation of this tutorial article we began with a group of small slabs of rhyolite material, collected over the years in the Fallon, Nevada areas of Wonderstone Mountain and the Dead Camel Mountains. The white background wonderstone pieces are a bit softer than the darker rhyolite in the group, but we are experienced with both and know that in a vibe tumbler heavily loaded with ceramic media these materials are compatible. We will talk more about loading the tumbler barrel when we reach that step.
The most important thing you can do when starting to create a group of flat stones to tumble for jewelry is to choose your rock slabs very carefully for surface smoothness. Carefully check both sides, because the finished piece will be double-sided, and any deep scratches or grooves or saw marks you can see with your eyes, or detect with your fingers, will be even more visible after tumbling. Extra care taken now to choose very smooth slabs, especially if you are purchasing the slabs in person from a slab dealer, will save you from a ton of work on the flat lap trying to fix them. Also try to choose slabs of similar hardness and avoid wedge shaped slabs unless you plan to work the wedge shape into your final product design.

Now is the time to decide the shapes you wish to create with your stones and whether you want to use a tracing template, or to draw them by hand instead. To create our designs we used a common green plastic ellipses and circles template, as well as #3, #5, and #6 of the Great Shapes template set from The Gem Shop. If you need more inspiration on where to find cabochon templates, we have this article for you.

Just as you would do when designing cabochons, move the template around on top of the slab and visually capture the most interesting features of the rock, then trace the design directly onto the slab using an aluminum scribe or marking device. Whatever marking device you use, make sure it will not be easily smudged or wiped off with water. In the group below, we used an aluminum scribe and then traced the outline over it with fine tip Sharpie for visibility in the photo.
During this design phase, it’s important to try not to include unsightly cracks or vugs that will hold onto tumbler grit, or soft patches of matrix that will tumble away leaving unsightly patches. These rock surface issues are best avoided now, because they will only get worse later.
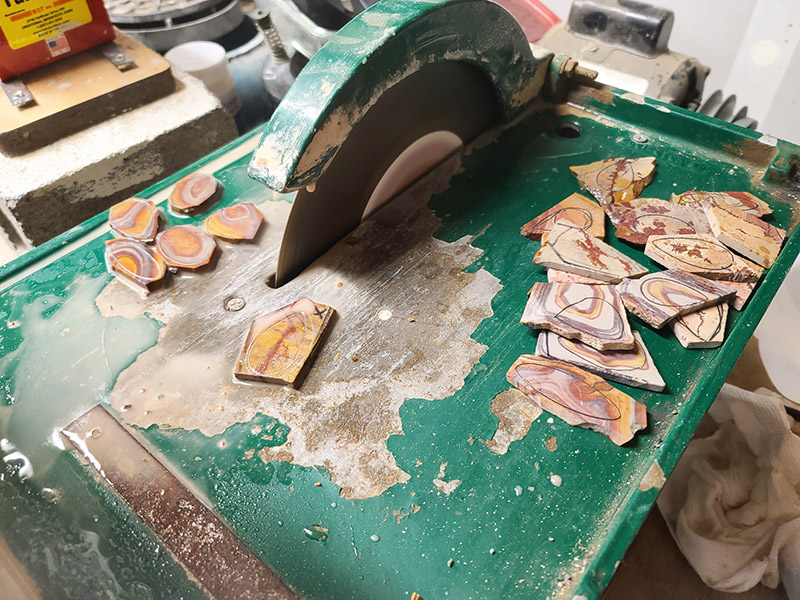
Using a good quality lapidary trim saw with a thin kerf blade to avoid unnecessary material loss, trim out your shapes as close as you can to your design marks without cutting into them. The more material you can remove at this step the less grinding you’ll have to do at the next step.
Due to the curvature of the blade, always trim ‘along’ or parallel to your design marks, and never cut directly at, or perpendicular to the scribe marks or unexpected results will occur. The technical explanation behind this is, when sliding an object directly into a curved blade, the underside of the object will touch the blade first. For this reason, trimming out inside corners like you would need to do when creating a cross shape is very tricky. One of our community members built a saw table jig to compensate for blade curvature and wrote up this excellent cutting 90 degree inside corners tutorial including detailed diagrams.

Once all of your flats are trimmed down, you are ready to grind each piece to it’s final shape. Using a 180/200 diamond grinding wheel, smooth out the cut sides all the way around the stone and bring them in close to the design marks. The technique shown below is to hold the stone at as close to a perfect 90 degree angle to the wheel, or flat lap plate, as you can while applying pressure and rotating. Continue this all of the way around the piece as needed until the entire edge is flat and smoothed and close to the drawn shape. Try to remove as much of the scribe and or Sharpie marks as you can and don’t rely solely on the tumbler to be able to remove them for you.
At this step it might be tempting to remove material quicker on your homemade super grinder, or by using a more aggressive grinding wheel, but we highly recommend against this. The use of an aggressive grinding wheel in the less than 180 grit range, will cause a lot of edge chipping to occur and will need to be fixed. Any chips on the top or bottom edges that you leave in place at this step will be bumpy and unsightly on the finished piece.

The same step as above can be accomplished on a flat lap machine that spins at, or close, to normal motor speed of 1750 RPM. A vibration flat lap, or a machine that is geared for slow speed will not work very good for this step. Hold the stone to the grit-charged plate as close to 90 degrees as possible and take your time smoothing out the entire perimeter to match the design plan. Again, try to remove as much of the scribe or Sharpie marks as you can during this process.

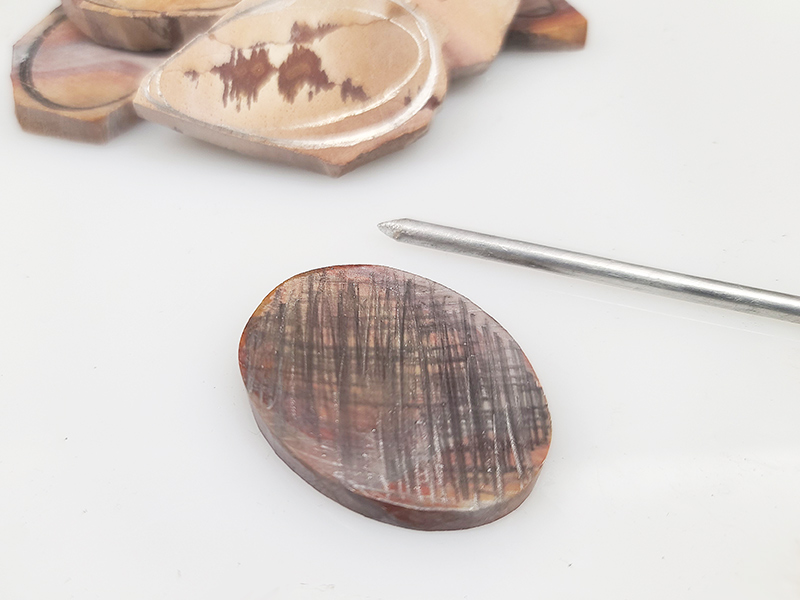
Before moving on, examine the top and bottom faces of the stones again. A well-adjusted lapidary slab saw should cut slabs that are pretty smooth – smooth enough anyway that you can move your prepared pieces directly into a vibe tumbler on a 120/220 grit and achieve flawless results. If you have any doubts about this, take the time to smooth out the top and bottom faces on the flat lap using 120/200 grit until all traces of saw marks and scratches are gone. This is also a perfect opportunity to remove whatever is left of the original scribe or Sharpie design marks and not rely on the tumbling process to finish that for you.
One trick many cabochon makers employ is to take their marking device and color the entire surface with a crosshatch pattern, then flat lap it until every trace of the marker is gone. If the crosshatch coloring reveals any scratches you had not previously noticed, you now have the opportunity to work repeat this step until the scratch is gone. One caution is try not to deposit markings into any cracks or vugs in the surface because tumbling alone is not likely to remove them for you later.

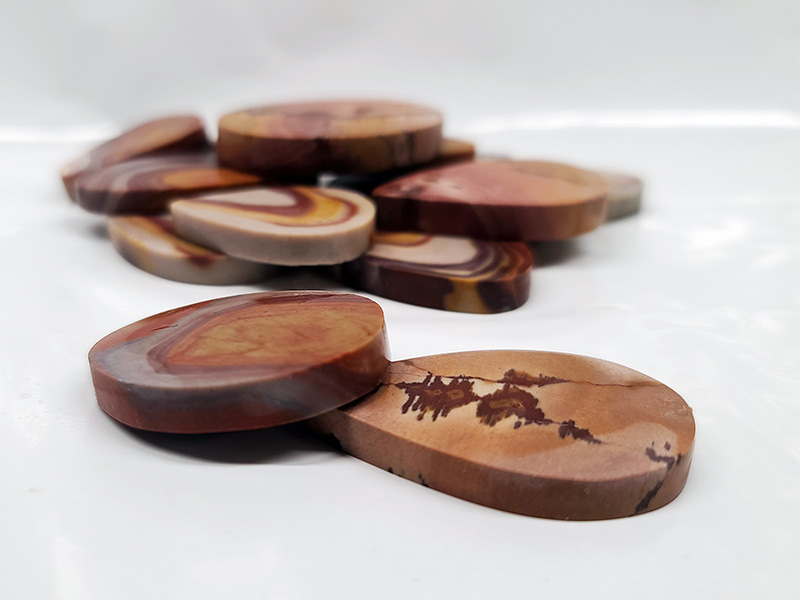
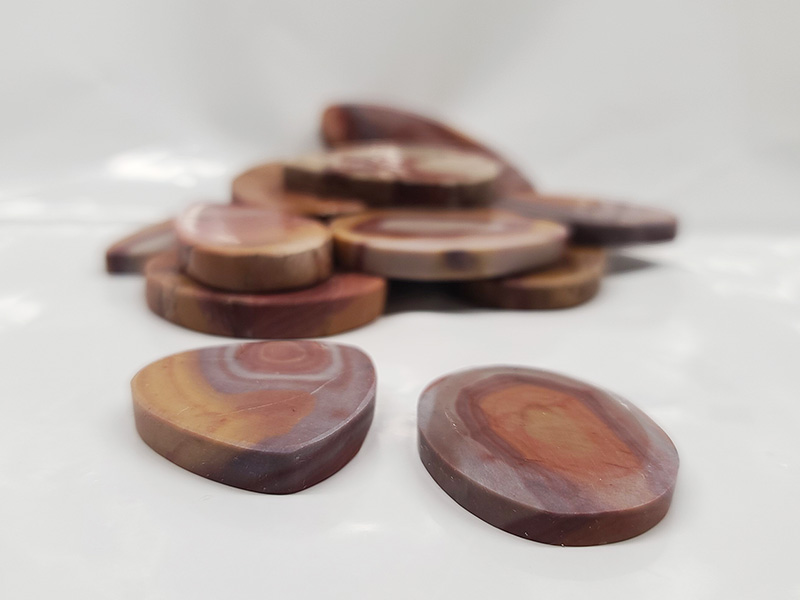
At this point you should have an entire batch of stones with smooth faces top and bottom, and nice chip-free corners. The nice sharp corners shown in the next photo will not stay this way because vibe tumbling has the natural effect of rounding over sharp edges, depending on the hardness of the material. The rounding that will occur is not as extreme as what happens with rotary rock tumbling, but some rounding will occur. In order to better control the edge rounding process, and reduce the possibility of new chipping occurring, a slight bevel can be ground into both the top and bottom edges all the way around the stone.
This step is entirely optional but if you do wish to bevel your corners it can be accomplished on either a grinding wheel or a flat lap, once again avoiding an aggressive grit level. Position the flat side edge of the stone at 90 degrees flush against the wheel or plate, then tilt the stone to approximately 45 degrees and apply a uniform grind on the edge all the way around the edge. When you’re happy with how it looks, flip the stone over and grind the other edge.

The amount of bevel applied to the edges of the stone can also be an artistic decision. A flat, tumbled stone with no bevel, or a matching bevel on both sides can be displayed from either side, front or back. If your intention is to specify which side of the stone is the front, perhaps by mounting the stone in a bezel, you can apply a deep bevel on the front side edges while leaving the back edge closer to square. In the next photo, all of the edges have received a slight bevel, but the stone on the right has been given a deep artistic bevel which makes it more suitable to be encased in a metal bezel by a metalsmithing artist.
When you have done all you wish to do with shaping and smoothing the stones, it is time to let the vibe tumbler do the rest. For a relatively small tumble load such as this, our Lot-O vibe tumbler will do a great job. Literally any vibe tumbler designed to tumble wet rocks can be used, so our choice of using the Lot-O is purely a lapidary tool decision based on ease of use and load size.

If you are new to vibe tumblers and need assistance with any of the steps involved from unboxing a new machine to final rinse, please join our friendly community if you’re not already a member, and create a thread on the RTH Forum rock tumbling area. Our forum community has many good folks who are very experienced with vibe tumbling and we guarantee you will get many polite and helpful responses.
Every experienced rock tumbler has developed methods and tricks that work for them and their specific tumbling equipment and workshop situation, so for this reason we will not delve too deeply into detailed rock tumbling processes here. It’s safe to say that whatever brand of tumbler you use and recipe you start with, the general goal is to progress through the recipe in one pass. With rock tumbling however, the decision to progress to the next step in the cycle should always be made after examining the progress of the rocks thus far.

For our purposes in creating flat stones that are beautifully polished on all sides, we use non-abrasive small to medium ceramic media and we fill the Lot-O barrel roughly half to three quarters full for a small load like this. The reason we use ceramic media is to cushion the rocks from banging into each other, and even more importantly, to carry and constantly rub the grit on every surface area of the rocks being tumbled.
Please note that using non-abrasive ceramic is very important in controlling the journey through the grit steps from 120/200 to the polishing compound. Abrasive ceramic has SiC (silicon carbide) grit embedded in it which turns each little ceramic piece into a grinding stone, and that’s not what we want.

For a relatively small tumbling load like this one we filled the Lot-O barrel up approximately half full with ceramic media and added the flat stones, then we continued adding ceramic media until the barrel is roughly three quarters full. The barrel was then filled with water, drained almost entirely, then the grit is added to the barrel on top of the wet media and stones and the machine is started.
As always with vibration tumbling, check the action of the barrel or bowl contents to make sure you are getting good rotation action and distribution of the grit, and make any necessary adjustments.

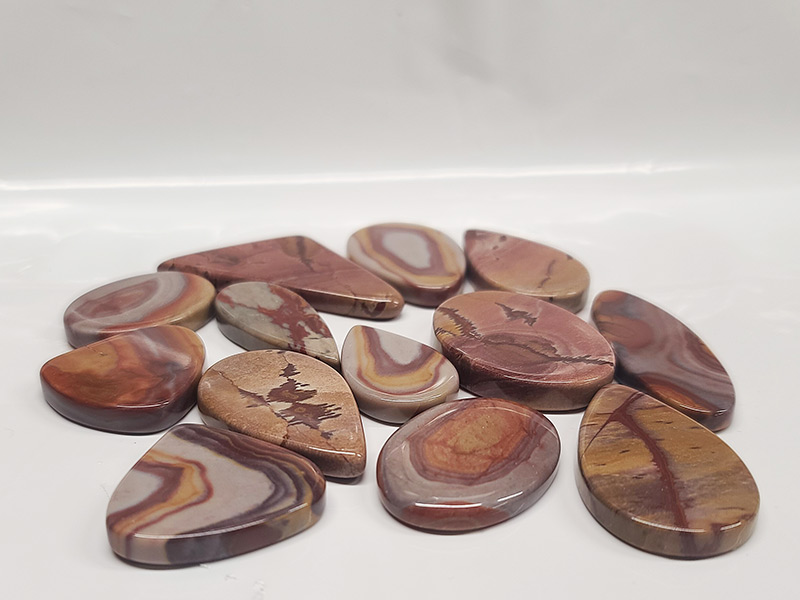
At the very end of the tumbling cycle which took us around ten days including the final burnishing and cleaning, we came away with thirteen beautiful flat pieces that are ready to be made into wearable stone jewelry. At the bottom right of the next photo is the one stone that was given the deepest bevel. As you can see, the shape of the top became very well-rounded, almost cabochon like. Of the entire group, this stone is the best one suited to be set in a bezel by a metalsmith due to the flat backside and well rounded topside edge.
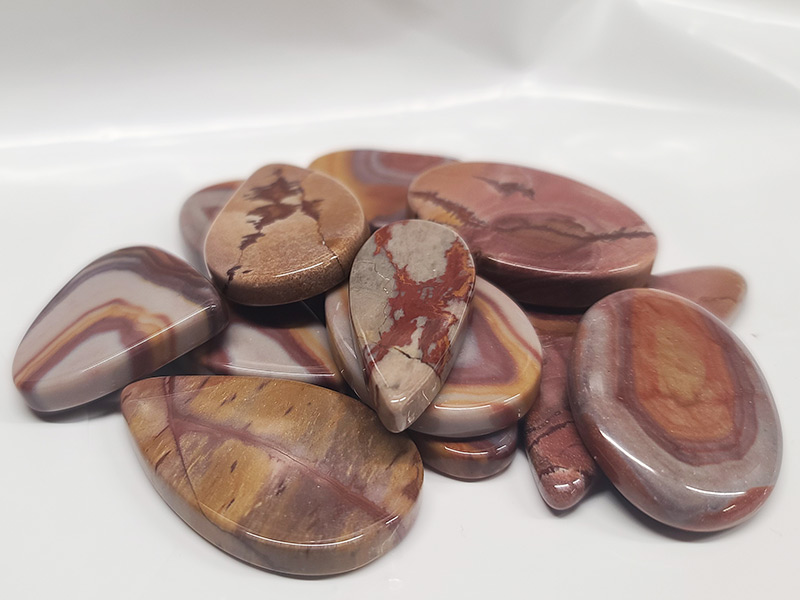
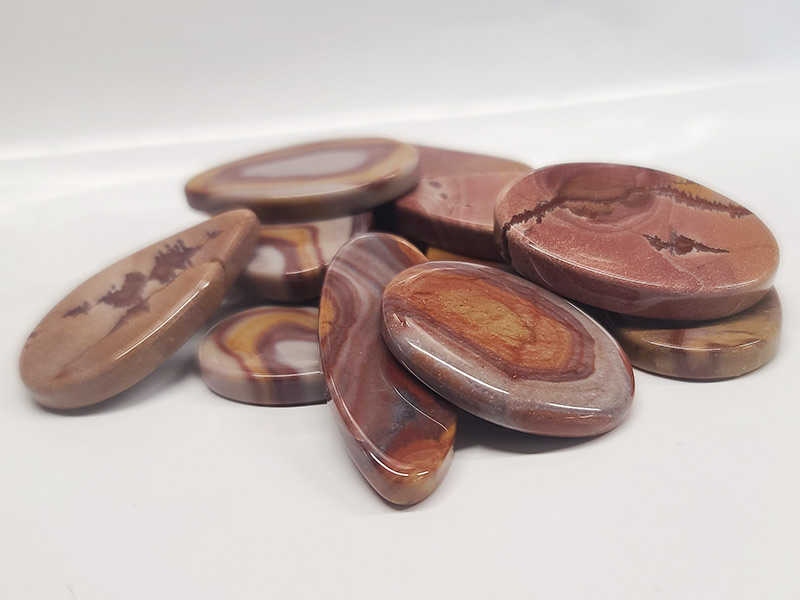

At this point we can now make our final decisions regarding how to accomplish transform each stone into an actual pendant. With flat stones like these the two most common choices are to drill a hole or glue on a bail, but if you have added the necessary shape adjustments, wire wrapping and metalsmithing can still be accomplished. We will save these decisions and the details of each process for another article.
Thank you for reading and following along. We hope that this tutorial has helped you achieve beautiful flat stones that can be made into wearable jewelry for you to sell or wear proudly. If you followed along with us and created a batch of flat stones for jewelry, please take lots of photos of your beautiful creations and post them the RTH Forum tumbling section for everyone to enjoy!